Showing posts with label chocolate. Show all posts

March 19, 2012

chocolate cupcakes with oreo whipped cream

A friend invited my sister and I over to her house last week for a girls craft night. We made adorable little pompom necklaces (I burned my fingers on the hot glue gun) and had great conversation. I wish I was more crafty... but at least I can bake one heck of a cupcake.


I brought along these delicious cupcakes. It's a dense chocolate cake with creamy, fluffy Oreo whipped cream icing. They are amazing little creatures. I love a thick, rich buttercream icing... but sometimes its nice to enjoy a light, airy whipped cream instead.

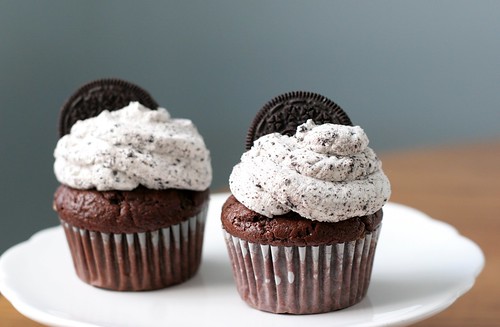


Especially when ground Oreos are mixed in. They are my favorite, seriously. I love cookies and cream milkshakes, ice cream, Oreo blizzards... just keep it coming.
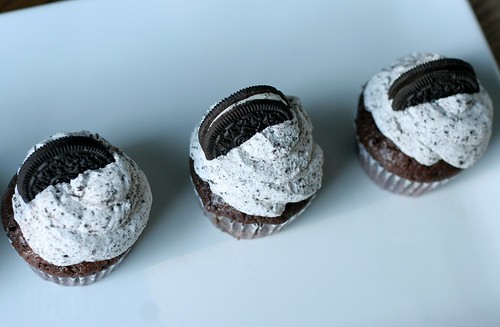


You will love these. Enjoy!


Chocolate Cupcakes with Oreo Whipped Cream

Makes 24 cupcakes

2 1/3 cups all-purpose flour
1 cup unsweetened cocoa powder, sifted
1 1/2 teaspoons baking powder
1/2 teaspoon baking soda
1/2 teaspoon salt
12 tablespoons unsalted butter, at room temperature
2 cups firmly packed light brown sugar
2 teaspoons vanilla extract
4 eggs
1 1/2 cups buttermilk, at room temperature
1 3/4 cups plus 2 tablespoons whipping cream
3 tablespoons powdered sugar
1/2 teaspoon vanilla extract
6 tablespoons Oreo cookie crumbs
24 Oreo cookie halves

Preheat oven to 350 degrees and line 2 cupcake pans with paper liners.

Mix flour, cocoa powder, baking powder, baking soda and salt in a large mixing bowl until combined. In a stand mixer, beat butter and sugar until creamy. Scrape down the sides of the bowl as needed. Then add vanilla and eggs, one at a time and mixing well after each one is added.

With the mixer on low, gradually add in dry mixture and buttermilk alternately in 3 parts, starting and ending with the dry mixture. After the last addition, stir until just combined being careful not to overmix the batter. Divide batter into prepare cupcake pans and bake for 16-18 minutes, or until a toothpick comes out clean with a few crumbs. Let cool completely on a wire rack.

To make the whipped cream frosting, combine cream, sugar and vanilla in a stand mixer with the whisk attachment. Beat on medium-heat speed until stiff peaks form, then gently fold in Oreo crumbs with a rubber spatula. Pipe the whipped cream onto the cooled cupcakes with your favorite tip and garnish with 1/2 Oreo cookie on top.

Recipe from: Annie's Eats (Ingredients are the same, directions have been altered.)

March 9, 2012

dark chocolate shortbread cookies

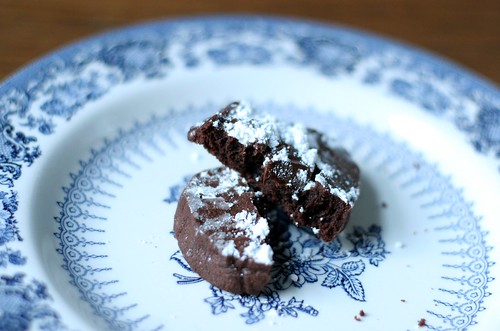
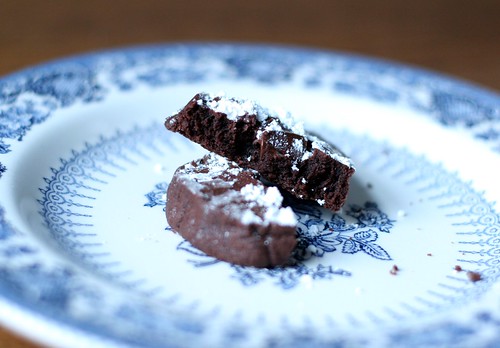
I made these cookies for a movie night we had at our house this week. They were a huge hit with our friends, especially for dark chocolate fans like myself.


They are VERY chocolatey, and obviously not very sweet. They have such a rich flavor.


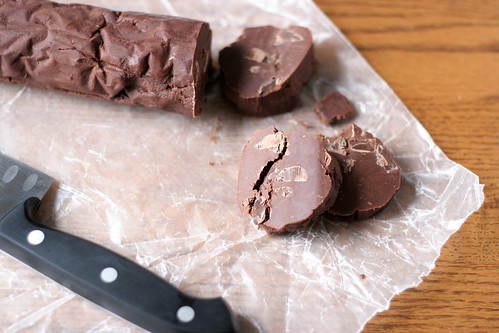
The dough was easy to make too. It's all done in a food processor and doesn't call for many ingredients. It will be crumbly, but just form it into a log and refrigerate it for at least an hour before baking... if you can wait that long.


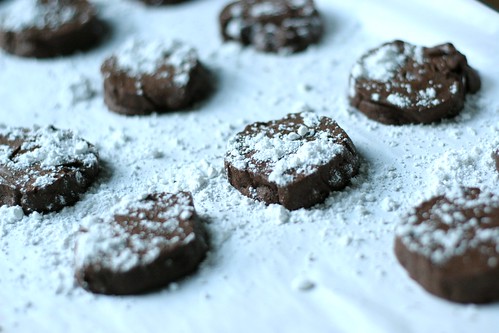
I sprinkled the ones I served to our friends with powdered sugar because I didn't think they could take how dark the chocolate was. But this is optional! Feel free to just eat them plain.


Chocolate fans rejoice. Your new favorite cookie is here.


Dark Chocolate Shortbread Cookies

Makes 10 to 12, but this recipe doubles very well

1 stick (1/2 cup) salted butter, softened
1/4 cup confectioner's (powdered) sugar
1 teaspoon vanilla
3/4 cup all-purpose flour
1/4 cup cocoa powder
1/2 cup bittersweet chocolate chunks or chips

In the bowl of a food processor, put the flour, sugar, and cocoa powder and pulse to combine well. Slice softened butter into about 1 inch slices, and drop into the food processor. Add vanilla and pulse until the mixture just comes together, you don't want to over mix it.

Put the mixture into a mixing bowl and add chocolate chunks. Stir until well incorporated, you will probably have to use your hands for this. Turn the dough out onto wax or parchment paper and form into an 8-inch log. Wrap it in the paper and twist both ends to secure. Refrigerate for at least an hour, or overnight. If you are planning on baking these after a few weeks or something, freeze the dough until ready to use.

To bake, use a sharp knife to cut the cookies in 1/2 inch slices. Place the cookies on a silicone mat or parchment lined baking sheet and bake in the center of the oven at 325 degrees for 12 to15 minutes. They will feel slightly soft, but don't over bake them. Cool for a few minutes on the pan and then transfer to a rack to cool completely. Optional: sprinkle with powdered sugar.

Recipe adapted from: The View From Great Island

February 13, 2012

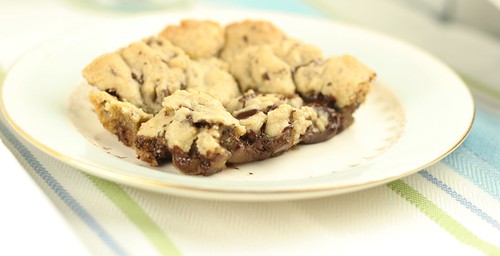
caramel chocolate chip cookie bars

Now that my husband and I (ahh husband!) have settled down a bit since the big day, we have started a Movie Monday tradition in our new home. We invite friends over for a snack and a movie every Monday. It is a wonderful way to see everyone during the week and catch up from the weekend. Plus, no one really looks forward to Mondays and going back to work... so this gives all of us something to get through the day.


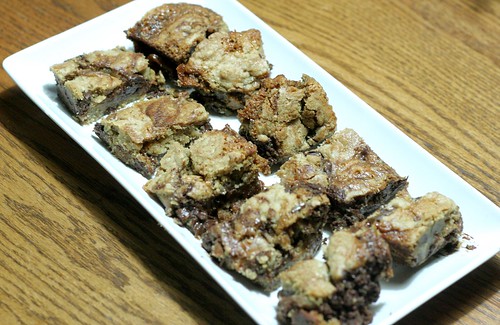
Last week, we watched the Adjustment Bureau and I made these caramel chocolate chip cookie bars. Let me tell you... they are so gooey and messy and delicious. The caramel in the center adds this amazing creamy texture.


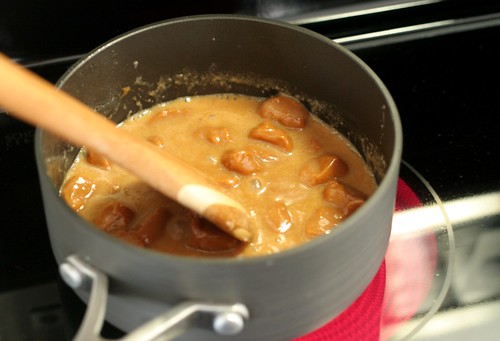
I unwrapped 20 or so milk caramels and melted them in a pot on the stove with a few tablespoons of milk.


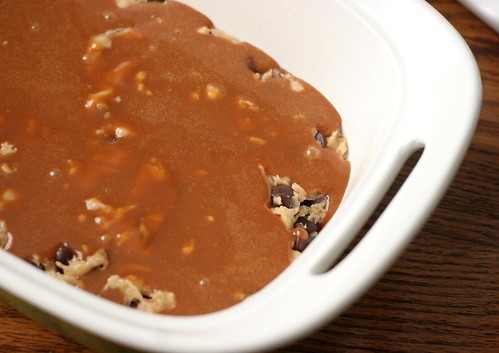
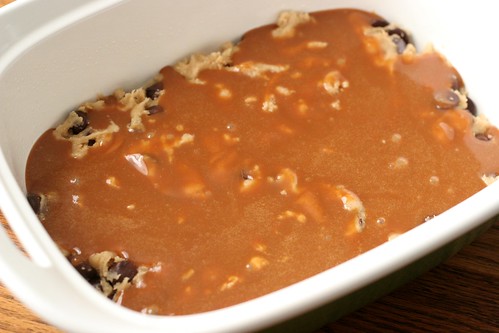
Spread half the cookie dough in a baking dish, then pour the creamy caramel sauce over the dough. The rest of the cookie dough goes on top, then its baked to ooey gooey perfection.


It is best to let these bars cool for at least an hour. I even stuck the pan in the fridge for 30 minutes or so, just to harden them up. They are SO gooey and almost hard to get out of the pan if you try to cut them too soon.


But trust me, it is worth every minute to wait for these bars. They are delicious. Enjoy!


Caramel Chocolate Chip Cookie Bars

Yields: 14 bars

2 1/8 cups all-purpose flour
1/2 teaspoon salt
1/2 teaspoon baking soda
12 tablespoons butter, melted and cooled to room temperature
1 cup light brown sugar
1/2 cup granulated sugar
1 large egg
1 large egg yolk
2 teaspoons vanilla extract
2 cups chocolate chips
10 ounces caramel candy squares (about 20), unwrapped
3 tablespoons milk

Preheat oven to 325 degrees F. Spray a 2-quart baking pan (which is an 11 X 7 pan-I used a glass Pyrex dish) with nonstick cooking spray and set aside. In a medium bowl, whisk together flour, salt, and baking soda. Set aside.

In the bowl of a stand mixer, mix the melted butter and sugars together until combined. Add the egg, egg yolk, and vanilla extract and mix until smooth. Slowly add the dry ingredients and mix on low, just until combined. Gently stir in the chocolate chips.

In a large microwave safe bowl, combine the caramels and milk. Microwave caramels on High until caramels are melted, stirring every 20 seconds. This will take about 2 minutes, depending on your microwave. You can also do this step on the stove top in a small nonstick pan over medium heat, stirring almost constantly.

Divide the cookie dough in half. Press half of the cookie dough into the prepared pan, smoothing the top with the spatula. Pour hot caramel over the cookie dough. Drop spoonfuls of cookie dough over the caramel and spread dough with a spatula until the caramel is covered.

Bake cookie bars for 30 minutes or until the top of the bars are light golden brown and the edges start to pull away from the pan. Cool bars on a wire rack to room temperature. You may want to put the pan in the refrigerator until the bars are easier to cut. Then cut bars into squares and serve.

Recipe adapted from: Two Peas and Their Pod

October 18, 2011

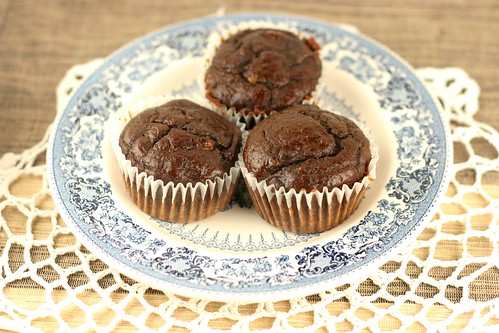
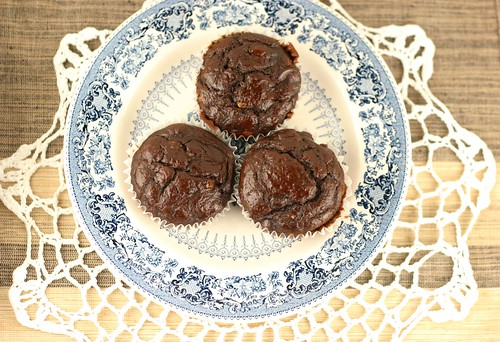
low-fat chocolate chip banana muffins

I'm looking back on this title and trying to figure out why I hyphenated "low-fat" but not the rest of it. One of life's greatest mysteries.

Also, hello everyone! I am back from hibernation.

I could go on and on about why I haven't blogged in a few weeks, but you already know. I've been busy. Actually there are no words for just how busy I've been. There have been a few weekend trips to New Jersey for weddings, home renovation stuff, working, wedding planning, a grandmother in the hospital, making time for my sweet nephew, trying to remember I have a life...

And now here I am with a banner that still says "August" when it's October. And somehow I haven't lost any followers, which means you are all awesome. There are also no words for just how amazing you are.

Thanks for sticking with me. I keep telling Michael after we get married in January and the wedding planning is done, the honeymoon is over, and our home renovation is mostly done (in theory), we are going to be so bored. I can't wait.


These muffins are SO GOOD. I just started Weight Watchers last week. I was convinced by my sister who lost almost 40 pounds since her baby was born 2 months ago. Amazing!

I found this muffin recipe on a Weight Watchers friendly blog called Skinny Taste. They only have 5 points (or 170 calories) each. Instead of oil and a stick of butter, you use mashed bananas and applesauce. Beauitful for my tongue and my waistline.


They have a very strong banana flavor, but all you smell is chocolate while you're eating them. It's so divine.

Here is the recipe:

Low-Fat Chocolate Chip Banana Muffins

2 tablespoons butter, softened
1/3 cup sugar
3 1/2 ripe medium sized bananas, mashed
1/4 cup natural unsweetened apple sauce
2 large egg whites
1/2 teaspoon vanilla extract
1 1/4 cups unbleached all purpose flour
1/4 cup unsweetened cocoa powder
3/4 teaspoon baking soda
1/4 teaspoon salt
3/4 cup dark chocolate chips (I used 70%)

Preheat oven to 325°. Line a muffin tin with 12 liners.

In a large mixing bowl cream butter and sugar with an electric mixer. Add egg whites, bananas, apple sauce, vanilla, and beat at medium speed until thick. Scrape down sides of the bowl.

In a medium bowl, combine flour, cocoa powder, baking soda and salt with a wire whisk. Add flour mixture to bananas, then blend at low speed until combined; do not over mix. Fold in chocolate chips and pour batter into muffin tins.

Bake on the center rack for 25 minutes, or until a toothpick inserted in the center comes out clean with a few crumbs.


(recipe adapted from SkinnyTaste)

July 4, 2011

chocolate chunk cookie bars

Happy 4th of July everyone!

It's a lovely summer day here in Delaware. I have the day off work, so I've spent some time organizing my bills and other papers this morning. Then I made some of the most delicious, gooey cookie bars of all time.


I have plans tonight with the love of my life, my best friend and bridesmaid Sarah, her husband Steve and their darling daughter Summer. Last year, we all went to the beach loaded up with beach chairs and sparklers. It was a perfect night with the sun setting over the water and fireworks lighting up the sky. I can't wait to go again this year.


We are leaving in a few hours, but I wanted to share the snack I'm bringing along tonight to share with everyone.


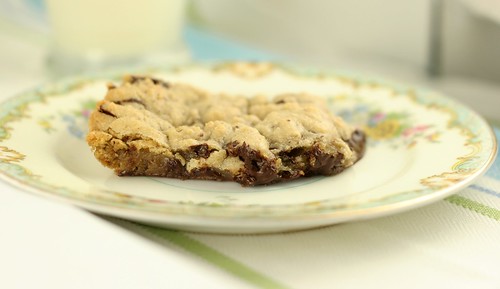
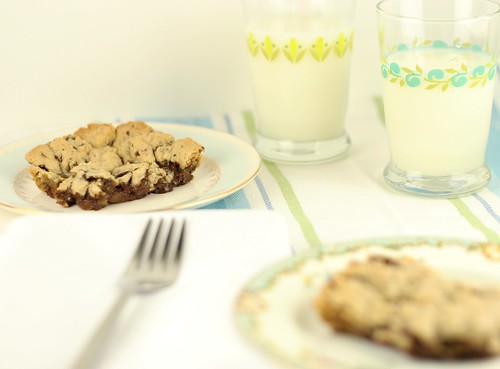
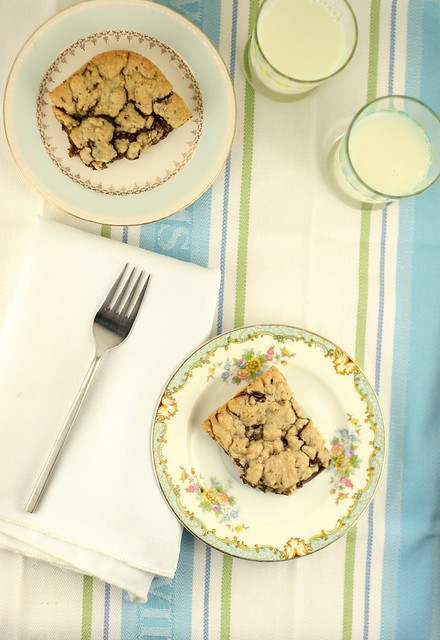
These cookie bars are loaded with chunks of chocolate. They are practically falling apart... so ooey gooey and buttery.


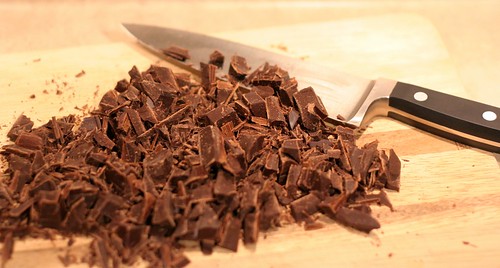
You could use chocolate chips of course, but I love the rough chunks in here. It adds a nice texture.


I put 2 1/2 cups in the recipe... but really I wanted to say - big giant pile of chocolate goodness.


Enjoy these delicious little squares of love with a big glass of milk - you're going to need it.


Chocolate Chunk Cookie Bars


print this recipe

2 cups flour
1 teaspoon salt
1/2 teaspoon baking soda
8 tablespoons (one stick) unsalted butter, softened
1 cup light brown sugar
1/2 cup sugar
1 large egg
1 large egg yolk
2 teaspoons pure vanilla extract
2 1/2 cups roughly chopped semi-sweet chocolate

Preheat oven to 325 degrees. Spray or grease a 13x9 baking dish and set aside.

In a medium bowl, whisk together flour, salt and baking soda. Set aside.

In the bowl of a stand mixer, mix the softened butter and sugars together until combined. Add the egg, egg yolk, and vanilla extract. Mix until smooth. Slowly add the dry ingredients and mix on low, until just combined. Stir in chocolate chunks.

Pour cookie dough into prepared pan and spread out evenly. Bake for 20 - 25 minutes, or until the top of the bars are just turning golden brown. Cool bars in pan, then cut and serve.

Serves: about 16 cookie bars


Recipe adapted from: Two Peas and Their Pod.

June 7, 2011

chocolate chip banana buttermilk loaf cake

This cake is a mouthful to say - chocolate chip banana buttermilk loaf cake. Shew. A lot of goodness in there.


I was sitting around this past weekend on a lazy Sunday with Michael and my parents. All of a sudden I announced, "I want to bake something."

So I went in Mom's kitchen and looked around. I saw bananas. I saw buttermilk in the fridge. I saw mini chocolate chips in the pantry. It was on.


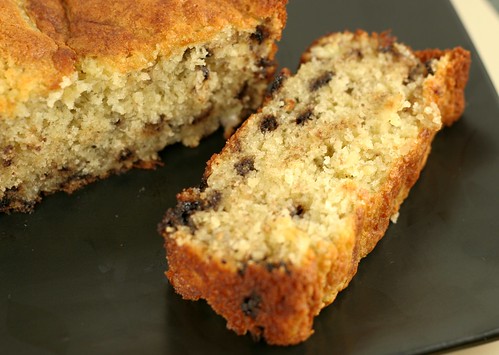
I mashed 2 large bananas, creamed butter and sugar, added my bananas and dry ingredients, then came chocolate chips... and just one bowl full of goodness later, I had super moist banana loaf cake ready to throw in the oven.


Loaf cake is thick and dense, so it's a little tricky to make sure it's cooked all the way through, but not burnt around the edges. I like to bake it half the time, then place a sheet of aluminum foil over the pan for the other half. This protects the top of the cake from browning too much in the oven. I also under-bake it. Most loaf cakes bake for 50 minutes. I baked this one for about 40 minutes on 325 degrees convection. Then I let it cool in the pan for 15 minutes before serving.


The result is an incredibly moist cake full of sweet banana flavor. The buttermilk adds a slightly tangy flavor to the cake, but not too overpowering.

My whole family loved it. It was epic banana loaf cake.


Chocolate Chip Banana Buttermilk Loaf Cake

print this recipe

1/2 cup unsalted butter, softened
1 cup granulated sugar
2 large eggs
1 cup mashed bananas (2 large bananas)
4 tablespoons buttermilk
1/2 teaspoon vanilla extract
1 3/4 cups all-purpose flour
1 teaspoon baking powder
1/4 teaspoon salt
1/8 teaspoon baking soda
1/2 cup mini chocolate chips

Grease and flour 1 large loaf pan. Preheat oven to 350 degrees or 325 degrees convection.

In the bowl of a stand mixer, cream butter and sugar together. Add eggs, mashed bananas, buttermilk, and vanilla until the batter is well mixed. Add in the flour, baking powder, salt and baking soda. Mix until well combined. Add chocolate chips and combine. Pour batter into loaf pan and bake for 20 minutes. Place sheet of aluminum foil over pan and bake for an additional 20 minutes or until a toothpick comes out with crumbs.

Let the cake cool for 15 minutes in the pan. Loosen the bread with a knife and carefully remove from pan. Finish cooling on rack. Slice and serve once cooled.


recipe adapted from: Two Peas and Their Pod

June 2, 2011

rocky road brownies

I am a chocolate lover through and through. Most of my favorite desserts involve chocolate and I am totally okay with that. When I make brownies, I enjoy them when they are warm, served with a scoop (or two) of vanilla bean ice cream then covered in chocolate syrup and whipped cream. Brownie sundaes all the way!


I haven't done much experimenting with different types of brownies, but I am VERY glad I experimented with these.


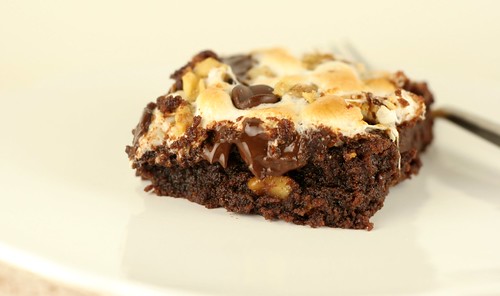
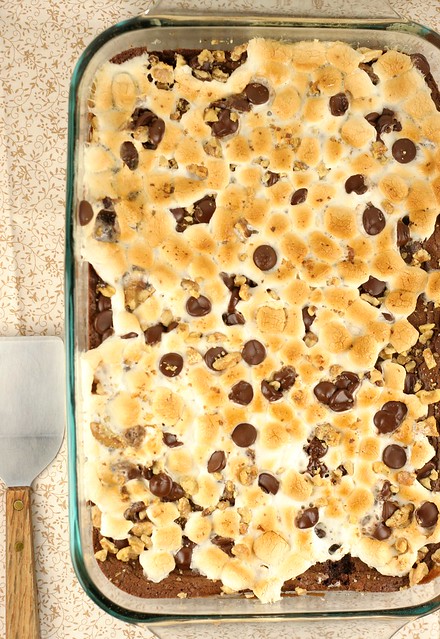
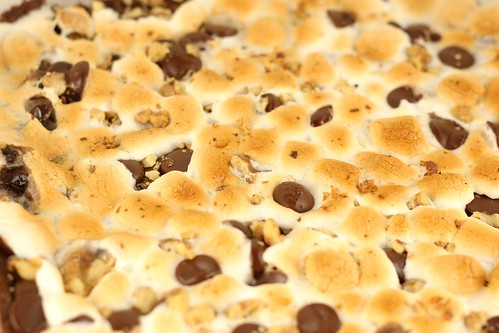
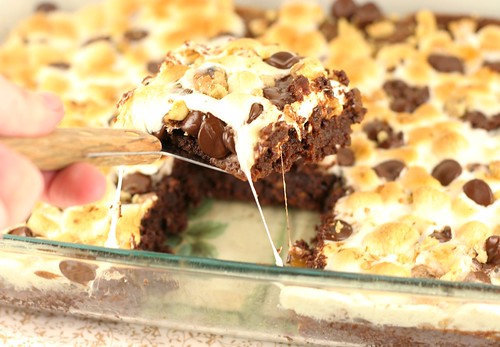
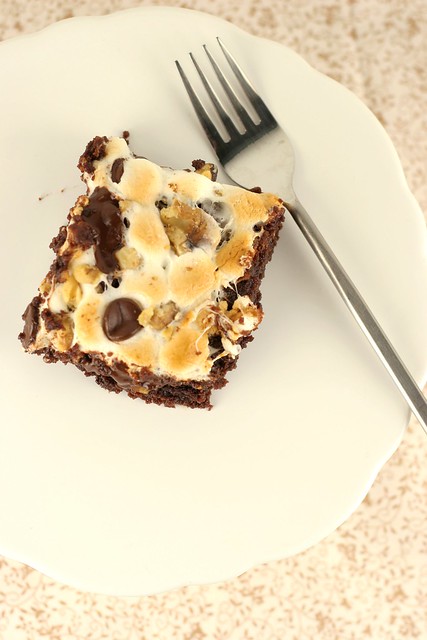
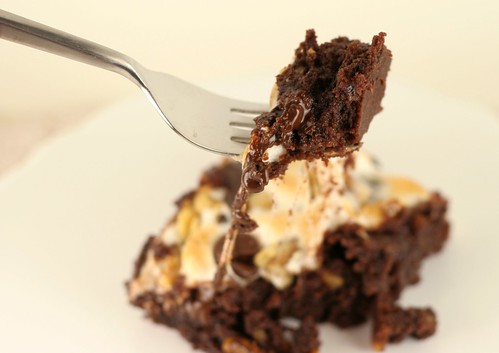
Imagine fudgy, super chocolatey brownies covered in chocolate chips, walnuts and marshmallows... then broiled until the marshmallows are toasty and the chocolate chips melt. Super indulgent.


 The base of the batter is melted chocolate chips and butter. I know. You're welcome.


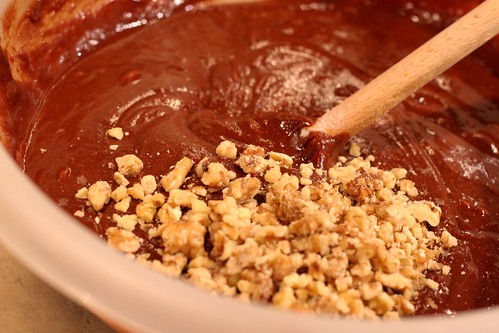
I mixed in some walnuts that I chopped fine. I am usually not a fan of walnuts in brownies, but I was experimenting so I went with it and I'm glad I did. The walnuts are small and as they bake, they dissolve into this buttery, nutty flavor in the brownies.


 .


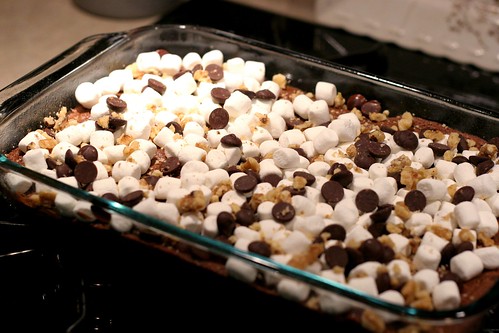
After they bake for about 20 minutes, sprinkle the top with mini marshmallows, chocolate chips and more chopped walnuts. 


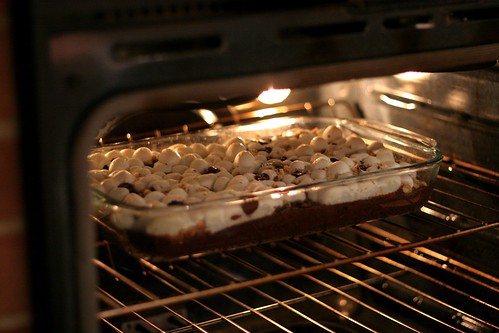
Since the brownies are already baked almost all the way through, we just need to brown the marshmallows on top. I stuck mine under the broiler for about 4 minutes until they were light brown.


I had visions of campfires dancing through my head.


The toasted marshmallows add a different texture - almost slightly chewy. The walnuts have a soft crunch and the whole thing is so sinful and delicious I can't even stand it.

I took these to a Memorial Day Barbecue at Michael's Mom's house. They were totally gone by the time I left... which I'm still trying not to be bitter about.


Enjoy this one!


Rocky Road Brownies

print this recipe

2 sticks (1 cup) unsalted butter, cut into pieces
1 1/2 bags (18 ounces) semisweet chocolate chips
1/2 cup granulated sugar
1 cup packed light-brown sugar
1 tsp salt
4 large eggs
1 1/4 cup all-purpose flour
1 1/2 cup mini marshmallows
1 cup chopped walnuts

Directions:

Preheat oven to 350 degrees. Grease a 9 x 13 inch baking pan.

In a large heatproof bowl, combine butter and 2 cups chocolate chips. Melt in the microwave on high power for 2 to 3 minutes, stirring every 30 seconds.

Into the chocolate/butter mixture, stir in sugars and salt. Once combined, stir in the eggs and then the flour, stirring just until combined. Mix in 1/2 cup of the walnuts. Spread batter evenly in prepared pan. Bake for 20 or 25 minutes, until a toothpick comes out with crumbs.

Remove from oven. Sprinkle with remaining chopped nuts, chocolate chips and marshmallows. Bake until the marshmallows are puffed and beginning to brown and the chocolate turns shiny, roughly 5 to 7 minutes. (If you like your marshmallows extra toasty, turn on the boiler of your oven and use that for the last few minutes. Be sure to turn the pan every minute or so to ensure even browning.)
Remove from oven and cool completely in pan.


Recipe adapted from A Dash of Sass.

April 25, 2011

chocolate orange cake

You will never know how good it felt to bake this cake... to stand there calmly stirring the batter, layering the cake, pouring that luscious chocolate glaze on top and watching it drip down the sides. It was food for my soul, really. Especially after 3 long weeks of going out to eat, traveling all over the place and hardly stepping in my kitchen at all except to get some water to drink or pour a bowl of cereal.


This is my own little "welcome back" celebration. And I picked a pretty awesome cake to celebrate with. I am three weeks into my new job and loving it. I am back from Arkansas. Michael and I are way ahead in our wedding planning. Everything seems to be settling down nicely.

Thank you guys for hanging in here with me. Reason #854 why you are awesome.


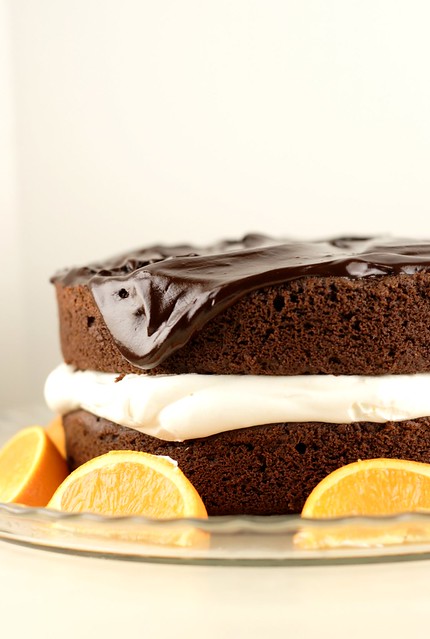
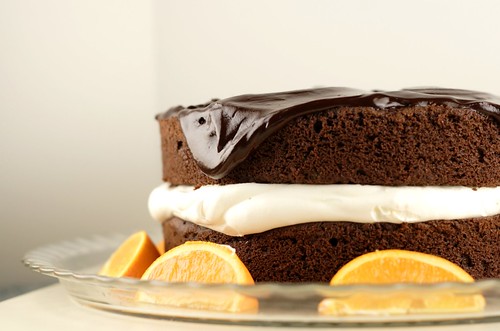
Now on to what you are really here for: the food. This beauty is a light chocolate cake with a fluffy orange filling and rich chocolate ganache poured on top. Oh yes.


This is an old fashioned cake recipe too, the kind that uses boiling water and cocoa powder to make a paste, which is mixed into the batter. Can't go wrong with that.

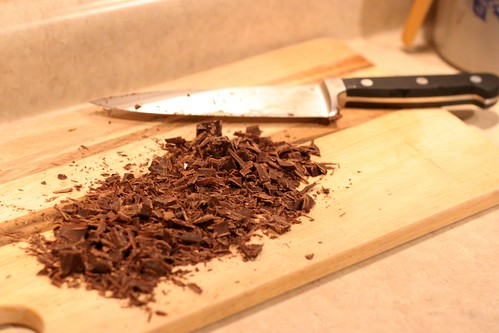
I chopped up about 8 total ounces of chocolate and almost a full cup of cocoa powder for this cake. So - it is chocolatey, people. In the best way possible.


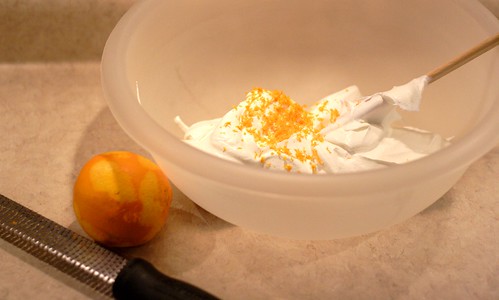
Raise your hand if you love fruit and chocolate! Love love love. I really love the bright citrus flavor that bursts out with this filling combined with rich chocolate cake. And the filling couldn't be easier - it's just cool whip mixed with orange zest and juice. So fresh and delicious.


I took this cake to Michael's Grandma's house for Easter dinner. It was so festive and perfect. Believe me when I say that the entire cake was gone. Someone even ate the decorative orange slices (probably my future husband)...


And of course the best part is the thick chocolate glaze on top. It adds this crazy richness to the cake and makes it look beautiful... totally irresistible. You know you want to stick your finger (or face) through this screen! I understand.

I missed you guys. Can't wait to reconnect!


Chocolate Orange Cake


print this recipe

Cake:
1 cup boiling water
2/3 cup unsweetened cocoa powder
2 ounces semisweet chocolate, chopped
1 3/4 cups sugar
6 tablespoons butter, softened
1 teaspoon vanilla extract
3 large egg whites
1/2 cup fat-free sour cream
1 2/3 cup flour
1 1/2 tablespoons cornstarch
1 teaspoon baking powder
3/4 teaspoon baking soda
1/2 teaspoon salt

Orange Filling:
6 ounces frozen light cool whip, thawed
2 tablespoons orange zest
2 tablespoons fresh orange juice

Chocolate Glaze:
2 tablespoons evaporated low-fat milk
1 tablespoon butter
4 ounces semisweet chocolate, chopped

Preheat oven to 350 degrees. To prepare cake, combine 1 cup boiling water and 2/3 cup cocoa powder in a bowl, stirring until smooth. Add 2 ounces chocolate; stir until smooth. Set aside to cool to room temperature. Meanwhile, coat 2 8-inch round cake pans with baking spray or butter.

Place 1 3/4 cups sugar, 6 tablespoons butter and 1 teaspoon vanilla in a large bowl. Beat with a mixer at medium speed 1 minutes. Add egg whites, one at a time, beating well after each addition. Add sour cream; beat at medium speed 2 minutes, egg whites should become slightly fluffy.

In a separate bowl, combine flour, cornstarch, baking powder, baking soda and salt. Stir to mix. Add flour mixture and cocoa mixture alternatively to sugar mixture, beginning and ending with flour mixture and beating until just combined. Divide batter evenly between the 2 prepared pans. Bake at 350 degrees for 25 minutes or until a wooden toothpick comes out with just a few crumbs. Cool in pans 10 minutes, then place on wire racks to cool completely.

To make filling, combine cool whip, orange zest and juice in a bowl. Set aside to assemble cake.

To make the chocolate glaze, combine evaporated milk, 1 tablespoon butter and 4 ounces chocolate in a microwave safe bowl. Microwave for 1 minute, stirring every 15 to 20 seconds until smooth.

Place cake layer on a plate and top with orange filling. Place the other cake on top and spoon chocolate glaze on top, until it's just falling over the edges.


Cake recipe adapted from Cooking Light Magazine

March 1, 2011

completed lighting project and a chocolate pudding torte

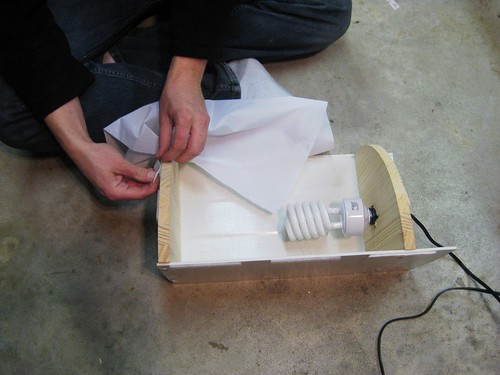
Michael and I have been working on a project for better lighting for my food pictures. He designed two light towers that give me enough light to shoot without flash, even if it's dark outside. He is my hero, basically.


So there has been a lot of sawing and drilling going on lately. Also a lot of bicep muscles and forearm veins. It's more than my little heart can handle.


He attached the top and bottom of the lights to the base.

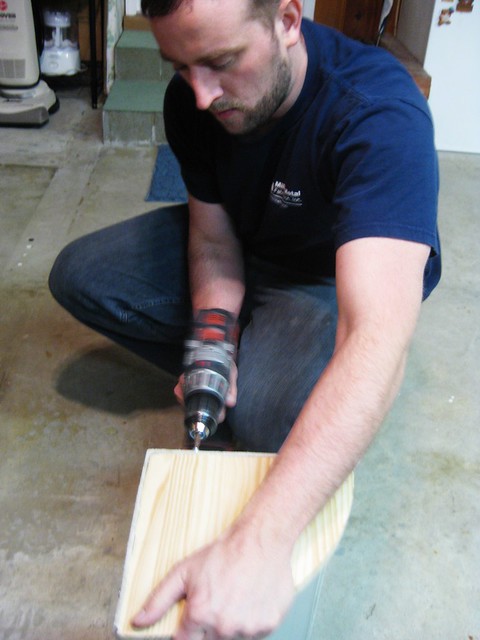
Can I just say - I'm so glad he knows how to do this stuff. He had to pre-drill holes into the wood and everything. I would have used the hammer and nail approach, unsuccessfully.


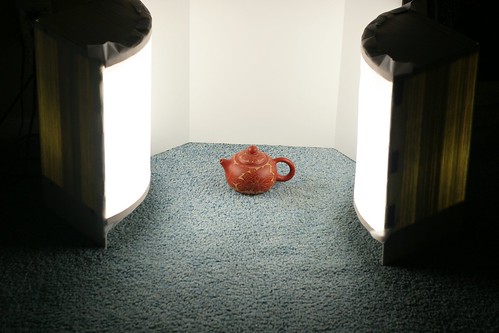
So we Michael built these lights and covered them in opaque nylon using velcro so I could take off the cover to change the bulb when I need to. After finishing both of them, we moved them to the floor in my room and started experimenting with camera settings.


The set-up looks like this. But now I have pretty fabric covering up the awesome 80's baby blue carpet.

They work beautifully. It is very helpful to have them. Thank you, Michael! You are the best, I mean it. I am so thankful for you.

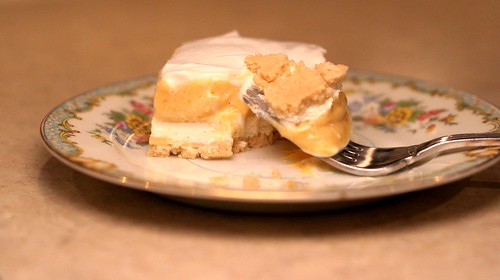
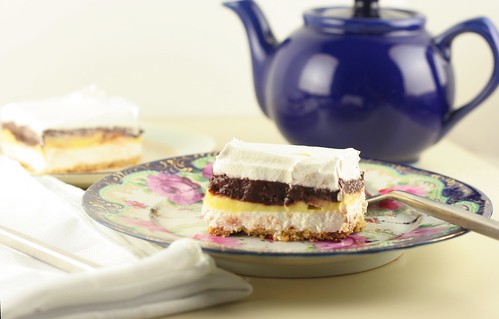
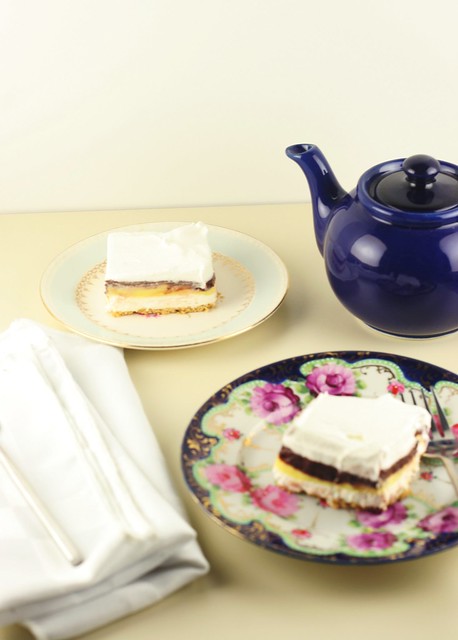
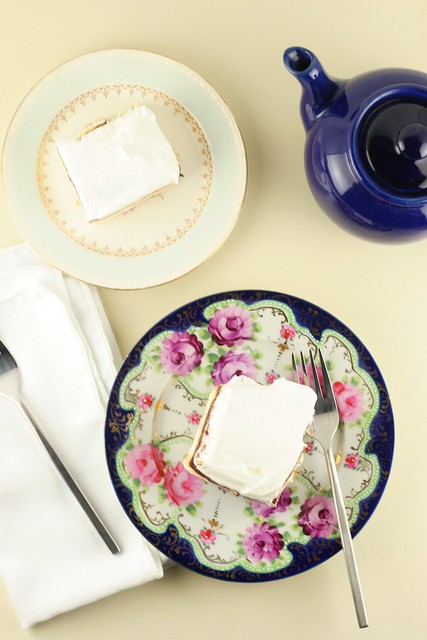
To celebrate the completion of our 3 week long project (we are busy), I made a pudding torte very similar to the pumpkin pudding torte I made this past fall. I wanted to show you the difference between the lighting in my kitchen and the lighting with my new towers.


Indoor lights.


Light towers.

Awesome, huh? So much more clear, bright, crisp. It even looks more appealing to eat!

So with that said - I love this pudding torte. My Mom has always made it for us growing up and called it "Italian Wedding Torte" so that name lives on in my family.


It's creamy with a buttery crust, and also pretty low in calories. It's a win/win situation with this dessert. And you know how much I love win/win situations. Totally ideal.


I can't wait to share more clear, bright pictures of my food with you. This makes me SO happy!

Here's the recipe!


Chocolate Pudding Torte

print this recipe

1 1/2 cups all purpose flour
1 stick butter, melted
1 8-oz block light cream cheese, softened
1 16-oz container of light cool whip, thawed
1 tablespoon sugar
1 large package of sugar free jello instant vanilla pudding
1 large package of sugar free jello instant chocolate pudding
4 cups nonfat milk

Preheat oven to 350 degrees. Mix together flour and butter in a small bowl with your hands until crumbly. Press into the bottom of a 13x9 pan, preferably glass. Bake at 350 degrees for 20-25 minutes or until golden brown. Put to the side to cool.

To make the cream cheese layer: use a hand mixer to cream softened cream cheese and 1/2 of the container of cool whip. Sweeten it with 1 tablespoon of sugar. Whip until fluffy. Once the crust is completely cooled, dot the cream cheese mixture around the crust. Use a small metal spatula to carefully spread the mixture around the crust. Keep working with it until it's all spread.

For the pudding layers: start with vanilla. You can use the same bowl you used for the cream cheese mixture. Empty the package of vanilla pudding into the bowl and pour in 2 cups of milk. Beat with a hand mixer until combined, about 3 minutes. Evenly spread the vanilla pudding over cream cheese layer. Use the same bowl to make chocolate pudding, using remainder 2 cups of milk. Beat with hand mixer. Pour over vanilla pudding and smooth. Top with remaining cool whip. Spread until smooth and cool whip covers the whole torte. Wrap it in plastic wrap and refrigerate for at least 1 hour, or overnight.