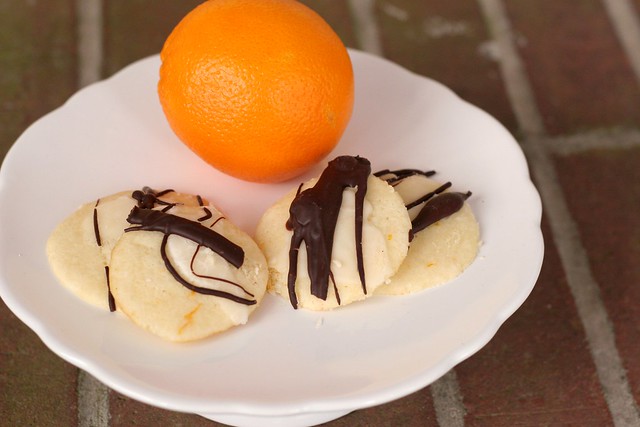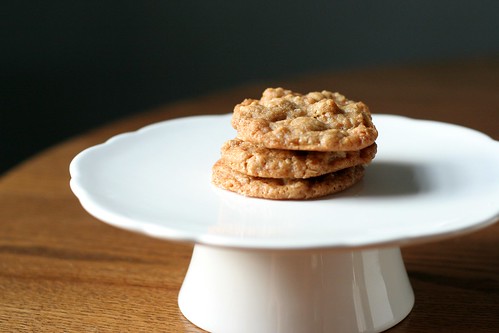
There has been a lot of chocolate going on lately... in the form of Caramel Chocolate Chip Bars, Chocolate Cupcakes with Oreo Cream and Dark Chocolate Shortbread. It's no secret that I'm a chocolate fan, but sometimes it is nice to enjoy cookies without throwing chocolate chips in the dough.
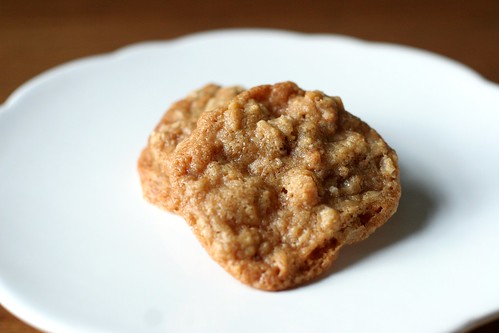
These Toffee Nut Cookies are so delicious. They are chewy, sweet and slightly crunchy. Even though I'm usually a fan of thick, fudgy-type cookies, I love how these are thin and chewy.
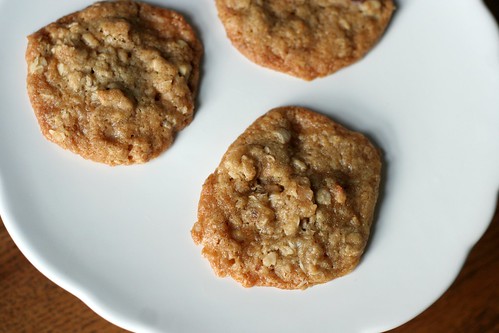
They have a buttery taste, and a nice crunch from the nuts and toffee pieces. They're kind of amazing.
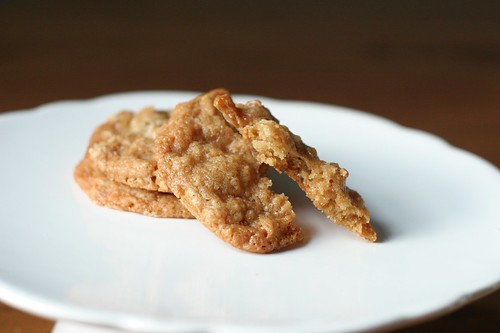
I made them for friends that came over for dinner last week. The dough makes quite a bit of cookies, so I was able to keep the rest of it in the refrigerator and bake off a few when I wanted them. You could also freeze it to use later.
But I'm just warning you... you're going to want to have this dough in your fridge at all times. You will be baking off a few (7) cookies at 3:00 in the morning. They're kind of addicting.
Enjoy!
Toffee Nut Cookies
Makes about 40 cookies
1 cup (2 sticks) butter
1 cup dark brown sugar
1 cup white sugar
1 teaspoon vanilla extract
2 eggs
2 cups flour
1/4 teaspoon salt
1/4 teaspoon baking soda
1 (10-ounce) bag toffee candy bits
1 1/2 cups oatmeal
1 cup chopped walnuts
Preheat oven to 350 degrees. Line a cookie sheet (or several if you're making all the cookies) with parchment or a silicone baking mat. Set aside.
In the bowl of a stand mixer, cream together the butter and sugar for a few minutes until fluffy. Add the eggs, one at a time, mixing thoroughly after each one. Add vanilla and stir. To the wet ingredients, add flour, salt and baking soda in one addition. Mix together, being careful not to over-mix the dough. Add in the toffee bits, oatmeal and walnuts. Stir until just combined. You may need to use a rubber spatula to scrape down the sides and incorporate any pieces that fell to the bottom of the bowl.
Take a teaspoonful or so of the dough (it should be pretty small, about the size of a large marble, if that's a real thing) and roll it in your hands until it forms a ball. Place onto your prepared cookie sheet and bake for 12-15 minutes or until cookies are golden brown.
Recipe Adapted From: the Food Network (ingredients and directions changed)
Showing posts with label cookies. Show all posts
March 26, 2012
March 9, 2012
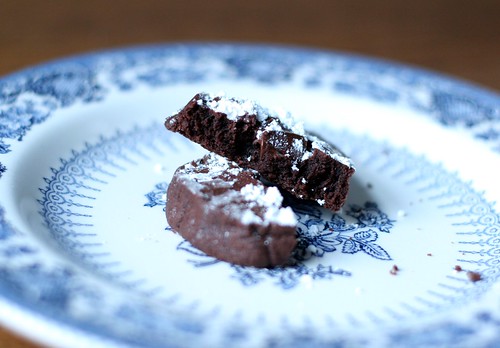
dark chocolate shortbread cookies
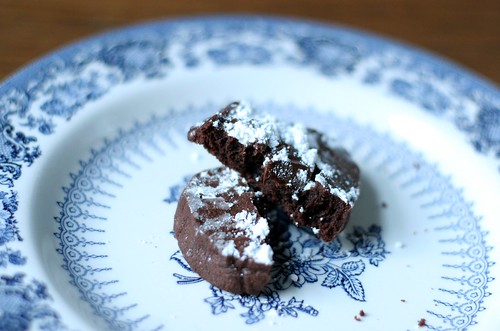
I made these cookies for a movie night we had at our house this week. They were a huge hit with our friends, especially for dark chocolate fans like myself.
They are VERY chocolatey, and obviously not very sweet. They have such a rich flavor.
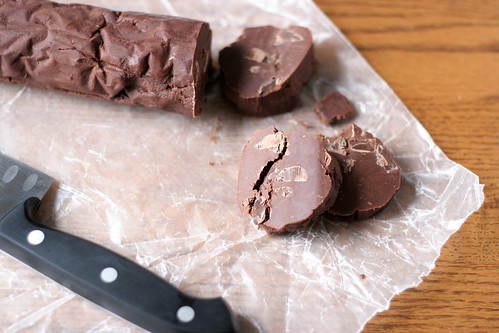
The dough was easy to make too. It's all done in a food processor and doesn't call for many ingredients. It will be crumbly, but just form it into a log and refrigerate it for at least an hour before baking... if you can wait that long.
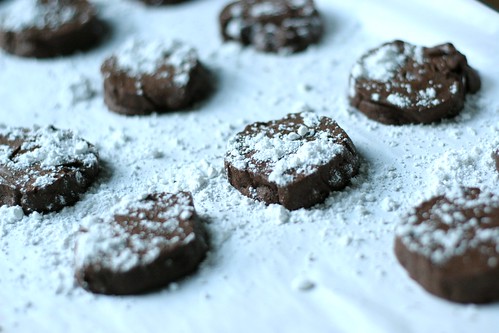
I sprinkled the ones I served to our friends with powdered sugar because I didn't think they could take how dark the chocolate was. But this is optional! Feel free to just eat them plain.
Chocolate fans rejoice. Your new favorite cookie is here.
Dark Chocolate Shortbread Cookies
Makes 10 to 12, but this recipe doubles very well
1 stick (1/2 cup) salted butter, softened
1/4 cup confectioner's (powdered) sugar
1 teaspoon vanilla
3/4 cup all-purpose flour
1/4 cup cocoa powder
1/2 cup bittersweet chocolate chunks or chips
In the bowl of a food processor, put the flour, sugar, and cocoa powder and pulse to combine well. Slice softened butter into about 1 inch slices, and drop into the food processor. Add vanilla and pulse until the mixture just comes together, you don't want to over mix it.
Put the mixture into a mixing bowl and add chocolate chunks. Stir until well incorporated, you will probably have to use your hands for this. Turn the dough out onto wax or parchment paper and form into an 8-inch log. Wrap it in the paper and twist both ends to secure. Refrigerate for at least an hour, or overnight. If you are planning on baking these after a few weeks or something, freeze the dough until ready to use.
To bake, use a sharp knife to cut the cookies in 1/2 inch slices. Place the cookies on a silicone mat or parchment lined baking sheet and bake in the center of the oven at 325 degrees for 12 to15 minutes. They will feel slightly soft, but don't over bake them. Cool for a few minutes on the pan and then transfer to a rack to cool completely. Optional: sprinkle with powdered sugar.
Recipe adapted from: The View From Great Island
They are VERY chocolatey, and obviously not very sweet. They have such a rich flavor.
The dough was easy to make too. It's all done in a food processor and doesn't call for many ingredients. It will be crumbly, but just form it into a log and refrigerate it for at least an hour before baking... if you can wait that long.
I sprinkled the ones I served to our friends with powdered sugar because I didn't think they could take how dark the chocolate was. But this is optional! Feel free to just eat them plain.
Dark Chocolate Shortbread Cookies
Makes 10 to 12, but this recipe doubles very well
1 stick (1/2 cup) salted butter, softened
1/4 cup confectioner's (powdered) sugar
1 teaspoon vanilla
3/4 cup all-purpose flour
1/4 cup cocoa powder
1/2 cup bittersweet chocolate chunks or chips
In the bowl of a food processor, put the flour, sugar, and cocoa powder and pulse to combine well. Slice softened butter into about 1 inch slices, and drop into the food processor. Add vanilla and pulse until the mixture just comes together, you don't want to over mix it.
Put the mixture into a mixing bowl and add chocolate chunks. Stir until well incorporated, you will probably have to use your hands for this. Turn the dough out onto wax or parchment paper and form into an 8-inch log. Wrap it in the paper and twist both ends to secure. Refrigerate for at least an hour, or overnight. If you are planning on baking these after a few weeks or something, freeze the dough until ready to use.
To bake, use a sharp knife to cut the cookies in 1/2 inch slices. Place the cookies on a silicone mat or parchment lined baking sheet and bake in the center of the oven at 325 degrees for 12 to15 minutes. They will feel slightly soft, but don't over bake them. Cool for a few minutes on the pan and then transfer to a rack to cool completely. Optional: sprinkle with powdered sugar.
Recipe adapted from: The View From Great Island
February 13, 2012
caramel chocolate chip cookie bars
Now that my husband and I (ahh husband!) have settled down a bit since the big day, we have started a Movie Monday tradition in our new home. We invite friends over for a snack and a movie every Monday. It is a wonderful way to see everyone during the week and catch up from the weekend. Plus, no one really looks forward to Mondays and going back to work... so this gives all of us something to get through the day.
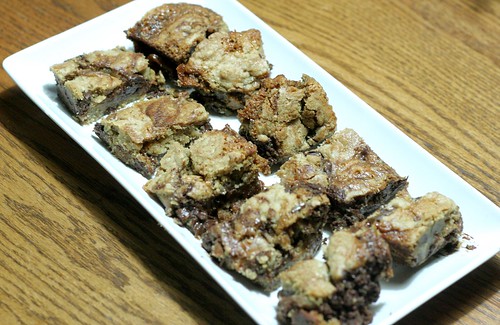
Last week, we watched the Adjustment Bureau and I made these caramel chocolate chip cookie bars. Let me tell you... they are so gooey and messy and delicious. The caramel in the center adds this amazing creamy texture.
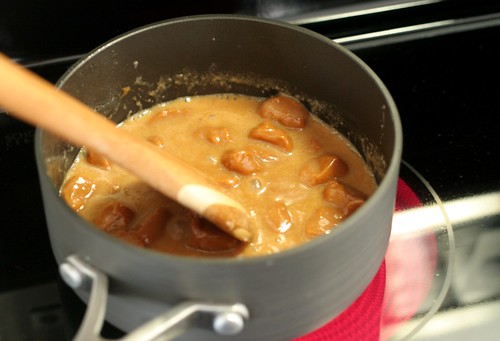
I unwrapped 20 or so milk caramels and melted them in a pot on the stove with a few tablespoons of milk.
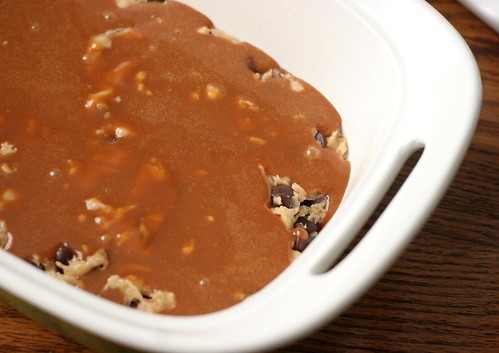
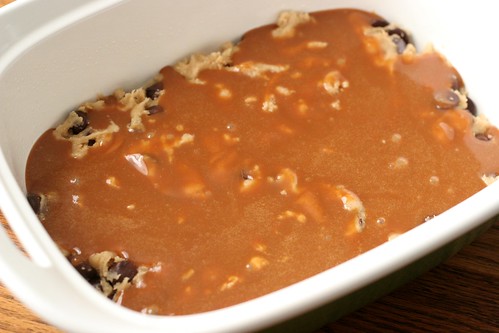
Spread half the cookie dough in a baking dish, then pour the creamy caramel sauce over the dough. The rest of the cookie dough goes on top, then its baked to ooey gooey perfection.
It is best to let these bars cool for at least an hour. I even stuck the pan in the fridge for 30 minutes or so, just to harden them up. They are SO gooey and almost hard to get out of the pan if you try to cut them too soon.
But trust me, it is worth every minute to wait for these bars. They are delicious. Enjoy!
Caramel Chocolate Chip Cookie Bars
Yields: 14 bars
2 1/8 cups all-purpose flour
1/2 teaspoon salt
1/2 teaspoon baking soda
12 tablespoons butter, melted and cooled to room temperature
1 cup light brown sugar
1/2 cup granulated sugar
1 large egg
1 large egg yolk
2 teaspoons vanilla extract
2 cups chocolate chips
10 ounces caramel candy squares (about 20), unwrapped
3 tablespoons milk
Preheat oven to 325 degrees F. Spray a 2-quart baking pan (which is an 11 X 7 pan-I used a glass Pyrex dish) with nonstick cooking spray and set aside. In a medium bowl, whisk together flour, salt, and baking soda. Set aside.
In the bowl of a stand mixer, mix the melted butter and sugars together until combined. Add the egg, egg yolk, and vanilla extract and mix until smooth. Slowly add the dry ingredients and mix on low, just until combined. Gently stir in the chocolate chips.
In a large microwave safe bowl, combine the caramels and milk. Microwave caramels on High until caramels are melted, stirring every 20 seconds. This will take about 2 minutes, depending on your microwave. You can also do this step on the stove top in a small nonstick pan over medium heat, stirring almost constantly.
Divide the cookie dough in half. Press half of the cookie dough into the prepared pan, smoothing the top with the spatula. Pour hot caramel over the cookie dough. Drop spoonfuls of cookie dough over the caramel and spread dough with a spatula until the caramel is covered.
Bake cookie bars for 30 minutes or until the top of the bars are light golden brown and the edges start to pull away from the pan. Cool bars on a wire rack to room temperature. You may want to put the pan in the refrigerator until the bars are easier to cut. Then cut bars into squares and serve.
Recipe adapted from: Two Peas and Their Pod
Last week, we watched the Adjustment Bureau and I made these caramel chocolate chip cookie bars. Let me tell you... they are so gooey and messy and delicious. The caramel in the center adds this amazing creamy texture.
I unwrapped 20 or so milk caramels and melted them in a pot on the stove with a few tablespoons of milk.
Spread half the cookie dough in a baking dish, then pour the creamy caramel sauce over the dough. The rest of the cookie dough goes on top, then its baked to ooey gooey perfection.
It is best to let these bars cool for at least an hour. I even stuck the pan in the fridge for 30 minutes or so, just to harden them up. They are SO gooey and almost hard to get out of the pan if you try to cut them too soon.
But trust me, it is worth every minute to wait for these bars. They are delicious. Enjoy!
Caramel Chocolate Chip Cookie Bars
Yields: 14 bars
2 1/8 cups all-purpose flour
1/2 teaspoon salt
1/2 teaspoon baking soda
12 tablespoons butter, melted and cooled to room temperature
1 cup light brown sugar
1/2 cup granulated sugar
1 large egg
1 large egg yolk
2 teaspoons vanilla extract
2 cups chocolate chips
10 ounces caramel candy squares (about 20), unwrapped
3 tablespoons milk
Preheat oven to 325 degrees F. Spray a 2-quart baking pan (which is an 11 X 7 pan-I used a glass Pyrex dish) with nonstick cooking spray and set aside. In a medium bowl, whisk together flour, salt, and baking soda. Set aside.
In the bowl of a stand mixer, mix the melted butter and sugars together until combined. Add the egg, egg yolk, and vanilla extract and mix until smooth. Slowly add the dry ingredients and mix on low, just until combined. Gently stir in the chocolate chips.
In a large microwave safe bowl, combine the caramels and milk. Microwave caramels on High until caramels are melted, stirring every 20 seconds. This will take about 2 minutes, depending on your microwave. You can also do this step on the stove top in a small nonstick pan over medium heat, stirring almost constantly.
Divide the cookie dough in half. Press half of the cookie dough into the prepared pan, smoothing the top with the spatula. Pour hot caramel over the cookie dough. Drop spoonfuls of cookie dough over the caramel and spread dough with a spatula until the caramel is covered.
Bake cookie bars for 30 minutes or until the top of the bars are light golden brown and the edges start to pull away from the pan. Cool bars on a wire rack to room temperature. You may want to put the pan in the refrigerator until the bars are easier to cut. Then cut bars into squares and serve.
Recipe adapted from: Two Peas and Their Pod
July 4, 2011
chocolate chunk cookie bars
Happy 4th of July everyone!
It's a lovely summer day here in Delaware. I have the day off work, so I've spent some time organizing my bills and other papers this morning. Then I made some of the most delicious, gooey cookie bars of all time.
I have plans tonight with the love of my life, my best friend and bridesmaid Sarah, her husband Steve and their darling daughter Summer. Last year, we all went to the beach loaded up with beach chairs and sparklers. It was a perfect night with the sun setting over the water and fireworks lighting up the sky. I can't wait to go again this year.
We are leaving in a few hours, but I wanted to share the snack I'm bringing along tonight to share with everyone.
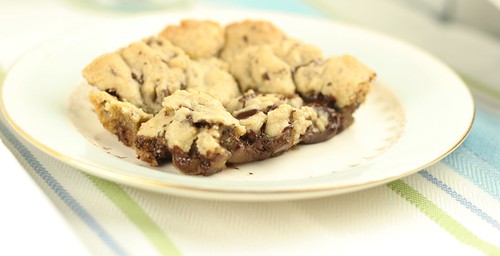
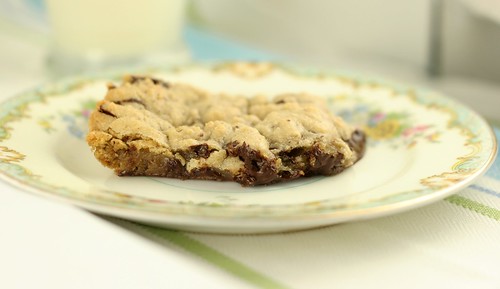
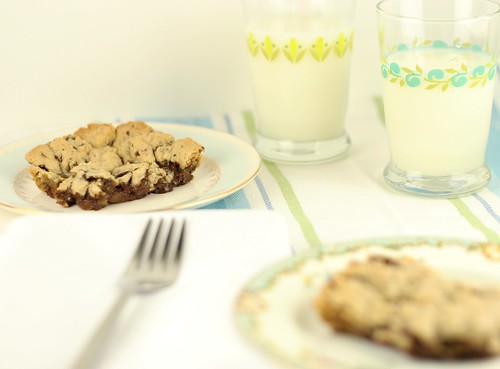
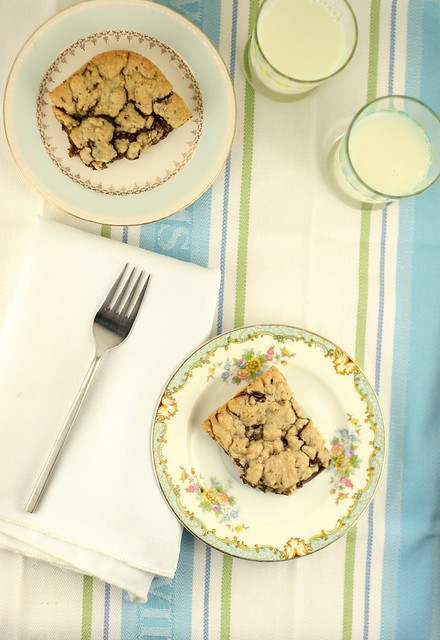
These cookie bars are loaded with chunks of chocolate. They are practically falling apart... so ooey gooey and buttery.
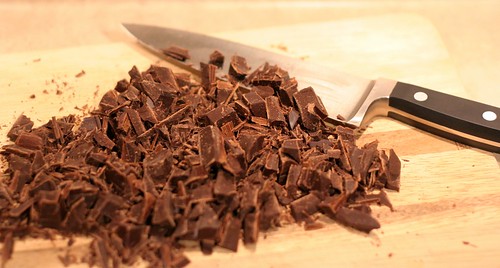
You could use chocolate chips of course, but I love the rough chunks in here. It adds a nice texture.
I put 2 1/2 cups in the recipe... but really I wanted to say - big giant pile of chocolate goodness.
Enjoy these delicious little squares of love with a big glass of milk - you're going to need it.
Chocolate Chunk Cookie Bars
print this recipe
2 cups flour
1 teaspoon salt
1/2 teaspoon baking soda
8 tablespoons (one stick) unsalted butter, softened
1 cup light brown sugar
1/2 cup sugar
1 large egg
1 large egg yolk
2 teaspoons pure vanilla extract
2 1/2 cups roughly chopped semi-sweet chocolate
Preheat oven to 325 degrees. Spray or grease a 13x9 baking dish and set aside.
In a medium bowl, whisk together flour, salt and baking soda. Set aside.
In the bowl of a stand mixer, mix the softened butter and sugars together until combined. Add the egg, egg yolk, and vanilla extract. Mix until smooth. Slowly add the dry ingredients and mix on low, until just combined. Stir in chocolate chunks.
Pour cookie dough into prepared pan and spread out evenly. Bake for 20 - 25 minutes, or until the top of the bars are just turning golden brown. Cool bars in pan, then cut and serve.
Serves: about 16 cookie bars
Recipe adapted from: Two Peas and Their Pod.
It's a lovely summer day here in Delaware. I have the day off work, so I've spent some time organizing my bills and other papers this morning. Then I made some of the most delicious, gooey cookie bars of all time.
I have plans tonight with the love of my life, my best friend and bridesmaid Sarah, her husband Steve and their darling daughter Summer. Last year, we all went to the beach loaded up with beach chairs and sparklers. It was a perfect night with the sun setting over the water and fireworks lighting up the sky. I can't wait to go again this year.
We are leaving in a few hours, but I wanted to share the snack I'm bringing along tonight to share with everyone.
These cookie bars are loaded with chunks of chocolate. They are practically falling apart... so ooey gooey and buttery.
You could use chocolate chips of course, but I love the rough chunks in here. It adds a nice texture.
I put 2 1/2 cups in the recipe... but really I wanted to say - big giant pile of chocolate goodness.
Enjoy these delicious little squares of love with a big glass of milk - you're going to need it.
Chocolate Chunk Cookie Bars
print this recipe
2 cups flour
1 teaspoon salt
1/2 teaspoon baking soda
8 tablespoons (one stick) unsalted butter, softened
1 cup light brown sugar
1/2 cup sugar
1 large egg
1 large egg yolk
2 teaspoons pure vanilla extract
2 1/2 cups roughly chopped semi-sweet chocolate
Preheat oven to 325 degrees. Spray or grease a 13x9 baking dish and set aside.
In a medium bowl, whisk together flour, salt and baking soda. Set aside.
In the bowl of a stand mixer, mix the softened butter and sugars together until combined. Add the egg, egg yolk, and vanilla extract. Mix until smooth. Slowly add the dry ingredients and mix on low, until just combined. Stir in chocolate chunks.
Pour cookie dough into prepared pan and spread out evenly. Bake for 20 - 25 minutes, or until the top of the bars are just turning golden brown. Cool bars in pan, then cut and serve.
Serves: about 16 cookie bars
Recipe adapted from: Two Peas and Their Pod.
January 3, 2011
orange ricotta cookies
I made these to give away at Christmas, which means I'm a little late posting. I actually kept these cookies in the freezer until I could shoot the finished product... just keeping it real.
I saw them on a food blog I follow, Two Peas and Their Pod. These cookies are bright and fresh with orange zest and juice. The dark chocolate adds a nice, rich texture. They're lovely little cookies.
Also, please note this adorable white cookie/mini cake stand. My preggo sister Ashley gave this to me for Christmas from Crate and Barrel. I love it. Thanks, Ashley!
They are also easy to make. It's a classic wet/dry ingredient type of situation.
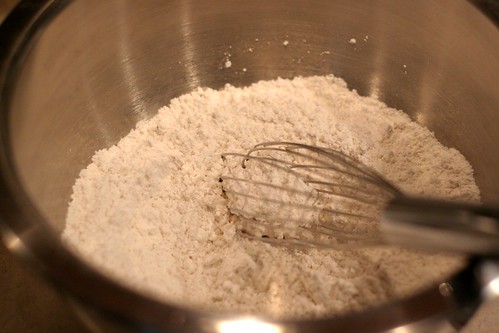
Start by whisking the dry ingredients in a bowl.
Beat the butter and sugar until creamy. Add both eggs and you get the above consistency.
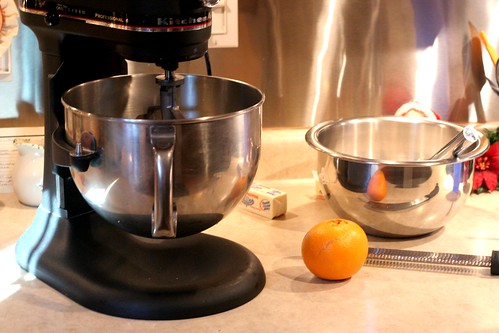
Now you have wet, dry and an orange waiting to be zested.
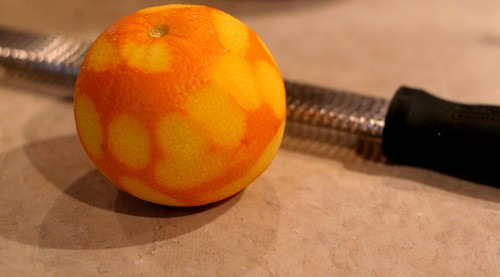
Throw the orange zest into the wet ingredients, being careful to avoid the bitter white part on the orange. Cut the orange and half and get all it's wonderful juice.
Next comes 2 cups of wonderful, creamy ricotta cheese. Can you imagine the texture it adds to cookies? Please. Too much.
Pour the dry ingredients into the wet ingredients and combine. You will have the above cookie dough, which really looks (and tastes) like cake batter. See the flecks of orange?
I used a melon baller to put them on a lined cookie sheet.
One time, Ashley and I were in Target and she asked me, "Do you see one of those cookie scoop things?"
"Oh you mean an ice cream scoop?"
"No, it's for cookies."
"Oh, a melon baller?"
"No, Jenna. A COOKIE SCOOP. It's for cookies only!!"
"Well that doesn't make any sense!"
Use a "cookie scoop", melon baller, 1/4 cup measure, spoon, your hands, whatever.
Check out this super-pro picture I took with my phone like, minutes before we left for Christmas Eve dinner.
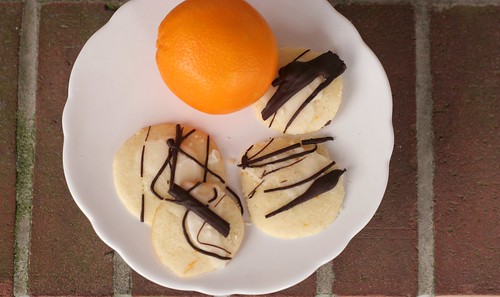
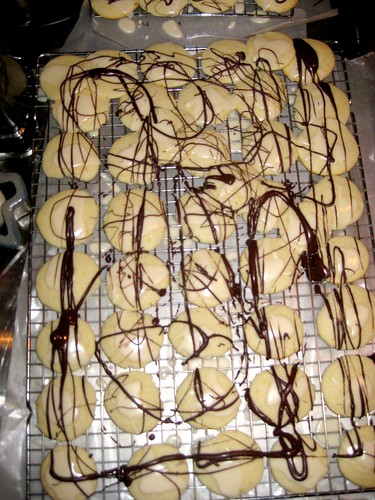
After they are baked and cooled, they get drizzled with an orange glaze and melted dark chocolate. I lined my counter top with parchment to do all the messy drizzling. Makes for an easier clean up.
Yum.
I hope you try these! Here's the recipe.
Orange Ricotta Cookies with Dark Chocolate
2 1/2 cups all-purpose flour
1 teaspoon baking powder
1 teaspoon salt
1/2 cup unsalted butter, softened
2 cups granulated sugar
2 large eggs
2 cups ricotta cheese
3 tablespoons fresh orange juice
1 orange, zested
Glaze:
1 1/2 cups powdered sugar
3 tablespoons orange juice
1 cup chopped dark chocolate, melted
Preheat the oven to 375 degrees F. Line a large baking sheet with parchment paper or a silicone baking mat. Set aside. In a medium bowl combine the flour, baking powder, and salt. Whisk until ingredients are combined. Set aside.
In the bowl of a stand mixer, combine butter and the sugar. Beat the until light and fluffy, about 3 minutes. Add the eggs, one at a time, until incorporated. Add the ricotta cheese, orange juice, and orange zest. Beat to combine.
Stir in the dry ingredients. Spoon the dough (about 1 tablespoon for each cookie) onto the baking sheets. Bake for 12-15 minutes, until slightly golden at the edges. Remove from the oven and let the cookies rest on the baking sheet for 2 minutes. Transfer to a wire rack and cool completely.
To glaze the cookies: combine the powdered sugar and orange juice in a small bowl and whisk until smooth. Spoon about 1/2-teaspoon onto each cookie and use the back of the spoon to gently spread. Let glaze harden for about five minutes. Drizzle cookies with dark chocolate and let the cookies set up. Makes about 4 dozen cookies.
I saw them on a food blog I follow, Two Peas and Their Pod. These cookies are bright and fresh with orange zest and juice. The dark chocolate adds a nice, rich texture. They're lovely little cookies.
Also, please note this adorable white cookie/mini cake stand. My preggo sister Ashley gave this to me for Christmas from Crate and Barrel. I love it. Thanks, Ashley!
They are also easy to make. It's a classic wet/dry ingredient type of situation.
Start by whisking the dry ingredients in a bowl.
Beat the butter and sugar until creamy. Add both eggs and you get the above consistency.
Now you have wet, dry and an orange waiting to be zested.
Throw the orange zest into the wet ingredients, being careful to avoid the bitter white part on the orange. Cut the orange and half and get all it's wonderful juice.
Next comes 2 cups of wonderful, creamy ricotta cheese. Can you imagine the texture it adds to cookies? Please. Too much.
Pour the dry ingredients into the wet ingredients and combine. You will have the above cookie dough, which really looks (and tastes) like cake batter. See the flecks of orange?
I used a melon baller to put them on a lined cookie sheet.
One time, Ashley and I were in Target and she asked me, "Do you see one of those cookie scoop things?"
"Oh you mean an ice cream scoop?"
"No, it's for cookies."
"Oh, a melon baller?"
"No, Jenna. A COOKIE SCOOP. It's for cookies only!!"
"Well that doesn't make any sense!"
Use a "cookie scoop", melon baller, 1/4 cup measure, spoon, your hands, whatever.
Check out this super-pro picture I took with my phone like, minutes before we left for Christmas Eve dinner.
After they are baked and cooled, they get drizzled with an orange glaze and melted dark chocolate. I lined my counter top with parchment to do all the messy drizzling. Makes for an easier clean up.
Yum.
I hope you try these! Here's the recipe.
Orange Ricotta Cookies with Dark Chocolate
2 1/2 cups all-purpose flour
1 teaspoon baking powder
1 teaspoon salt
1/2 cup unsalted butter, softened
2 cups granulated sugar
2 large eggs
2 cups ricotta cheese
3 tablespoons fresh orange juice
1 orange, zested
Glaze:
1 1/2 cups powdered sugar
3 tablespoons orange juice
1 cup chopped dark chocolate, melted
Preheat the oven to 375 degrees F. Line a large baking sheet with parchment paper or a silicone baking mat. Set aside. In a medium bowl combine the flour, baking powder, and salt. Whisk until ingredients are combined. Set aside.
In the bowl of a stand mixer, combine butter and the sugar. Beat the until light and fluffy, about 3 minutes. Add the eggs, one at a time, until incorporated. Add the ricotta cheese, orange juice, and orange zest. Beat to combine.
Stir in the dry ingredients. Spoon the dough (about 1 tablespoon for each cookie) onto the baking sheets. Bake for 12-15 minutes, until slightly golden at the edges. Remove from the oven and let the cookies rest on the baking sheet for 2 minutes. Transfer to a wire rack and cool completely.
To glaze the cookies: combine the powdered sugar and orange juice in a small bowl and whisk until smooth. Spoon about 1/2-teaspoon onto each cookie and use the back of the spoon to gently spread. Let glaze harden for about five minutes. Drizzle cookies with dark chocolate and let the cookies set up. Makes about 4 dozen cookies.
Subscribe to:
Posts (Atom)