June 6, 2012

basil mozzarella pinwheels

Has a been a month since I've blogged? More than that? Okay, let's just look past that sad fact and move on...


These basil pinwheels are lovely little creatures. I love a sheet of puff pastry. The possibilities are endless! You could make something chocolatey, cheesy, salty, fruity, spicy or sweet. Of course it's more adventurous to make your own puff pastry, but when you're short on time the frozen version is a great shortcut.


I started by laying out a thawed sheet of puff pastry, then brushed the whole thing with egg wash. Then I chopped up fresh mozzarella and basil from my garden (aka the only thing that's really growing well...) and sprinkled it over the whole thing.


Then roll it up as tightly as possible before slicing it into 1/2 inch slices.


As it bakes, the mozzarella kind of oozes out and gets slightly brown. It's really delicious with bright, summery flavors. Keep it in mind for your next barbecue - your guests will be surprised when you serve this instead of baked beans!


Basil Mozzarella Pinwheels

Serves: 6

1 sheet frozen puff pastry (I used Pepperidge Farm)
1 egg
1 tablespoon water
6 ounces fresh mozzarella cheese
1/2 cup chopped fresh basil
Salt and pepper, to taste
Cooking spray

Preheat oven to 400 degrees.

Let the sheet of puff pastry sit out at room temperature for about 35 minutes, until its mostly thawed. Lay it out on the counter top and make sure the fold marks are smoothed out. Beat the egg and water in a small bowl, then brush it all over the puff pastry.

Chop up the mozzarella cheese into small pieces, then place evenly over the puff pastry. Do the same thing with the basil. Season with salt and pepper. Starting at the bottom (the smaller side of the rectangle) roll as tightly as possible.

Then, using a sharp serrated knife, carefully slice the roll into 1/2 inch pieces. Let the knife do the work, don't press down too hard. Place the pieces on a cookie sheet sprayed with cooking spray and brush each pinwheel with remaining egg wash. Bake for 15 minutes or until the pastries are golden brown. Remove the pastries from the baking sheet and let cool on wire racks for 10 minutes.


April 17, 2012

easy monkey bread

Work has been crazy the last few weeks. I've been leading a culinary tourism campaign (awesome, right?!) that links local restaurants to producers and growers in our area. It will highlight restaurants that are already serving local, and encourage restaurants who aren't. I am excited to see where this project goes!

Here is the website I've been working on. It launched yesterday, part of the reason I've been so busy! Writing content and designing a website from scratch is no joke.

Local on the Menu

All this work hasn't left me much time for baking. I needed an easy dessert one night, so I found this Monkey Bread recipe that is made from a can of biscuits... and I am not ashamed.


You just make a cinnamon sugar mixture, then melt some butter.


I set up a little station with my bowl of melted butter, cinnamon sugar and a loaf pan. Cut the biscuits into quarters, dip the pieces in melted butter then roll them in cinnamon sugar. Yes it's true.


Line up those little beauties in a loaf pan. You will probably end up putting a few pieces on top of the first layer... unless you eat them of course. I'm just saying.


It bakes up beautifully. The melted butter caramelizes the sugar and creates this gooey center just dripping with a syrup-y cinnamon glaze. I mean you can just imagine what biscuits dunked in melted butter tastes like. It's out of control.


I set this pan of goodness out for our weekly movie night. People were just picking the pieces right from the pan and going to town.

I think I like this recipe so much because the only thing I don't keep stocked in my kitchen is the can of biscuits, so it's really easy just to run out and get one thing in a pinch. So if you need a super easy dessert you can make in just a few minutes, this is a good one.


Easy Monkey Bread

3/4 cup sugar
3 1/2 teaspoons cinnamon
1/3 cup melted butter
1 can buttermilk biscuits (I used Pillsbury)
Cooking spray

Heat oven to 400 degrees. Spray your loaf pan and set aside. In small bowl, combine sugar and cinnamon and mix well. Separate dough into individual biscuits and then cut them into quarters. Dip each quarter in the melted butter, then roll it in cinnamon sugar mixture. Arrange in the loaf pan. You may end up putting a few pieces on top of the first layer.

Bake for 15-18 minutes and let cool 2-3 minutes just so the sugar doesn't burn you. At this point, you can loosen the edges and place the whole loaf on a serving platter. Or let it cool a few more minutes and serve it right from the loaf pan.

Recipe adapted from Pillsbury

April 9, 2012

getting ready on our wedding day

I shared a few pictures (taken by a lovely family member, Jenny) of our special day. She was also there in the morning while my bridesmaids, my Mom and I were getting dressed.

Since I haven't written much about our wedding, I thought I would start sharing parts of that amazing day in pieces. It seems like the very beginning of the day is a perfect place to start.


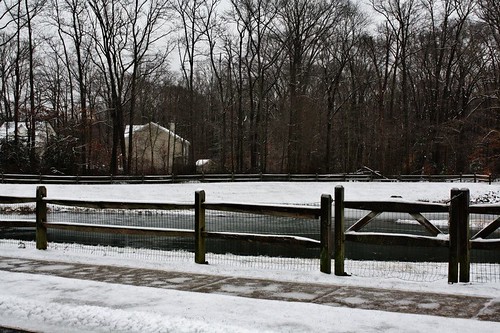
First of all let me say - we had a beautiful, snowy day. It was the perfect backdrop to our winter themed wedding. We haven't had much of a winter here in Delaware, so the fact that I had snow on my wedding day is something that will always make me so happy.

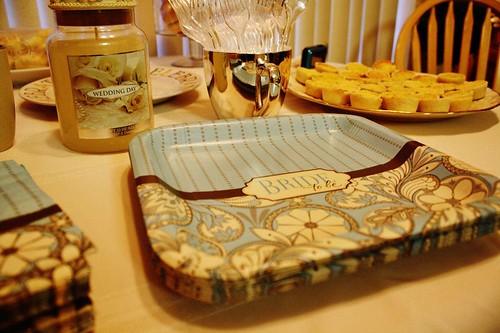
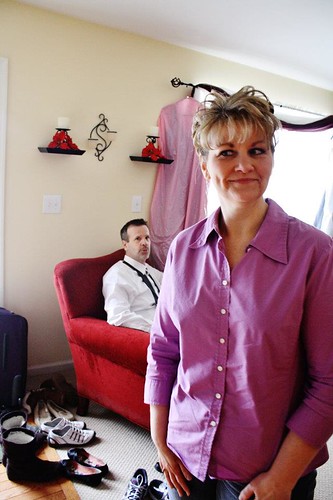
Michael and I got married on a Sunday in January, so needless to say there were not many (none) hair salons open that day. I tried for quite awhile to find a place that would open for us, but came up short. Finally I asked my beautiful, hospitable, amazing cousin Janice if she knew of any stylists in her area. She only lives about 20 minutes from our wedding venue. She ended up inviting all us girls over to her home to get ready there, and have a few stylists come to the house to do our hair.


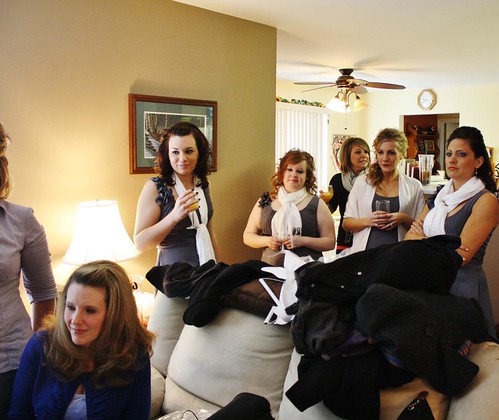
It was the perfect plan and I am very grateful that it worked out that way. We all felt so comfortable being in her home instead of a salon. We were able to spread out, sit in comfy chairs and sofas.


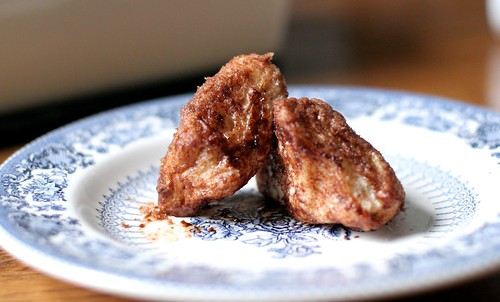
Janice prepared a delicious breakfast for us complete with quiche, bagels, fruit and coffee. All the married ladies there kept reminding us to eat, which is hard to tell a bride the morning of her wedding. But I did get to enjoy a little quiche, fruit and orange juice.


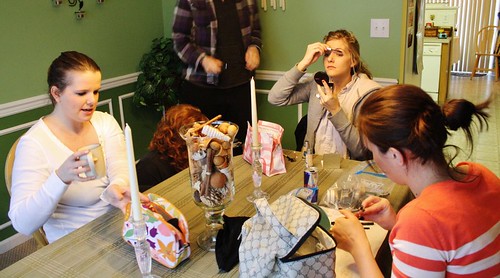
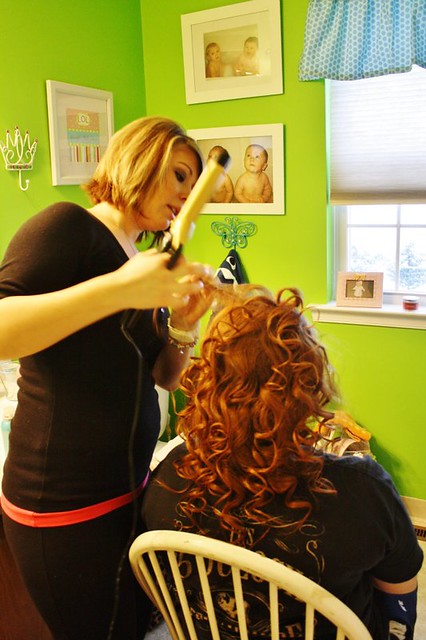
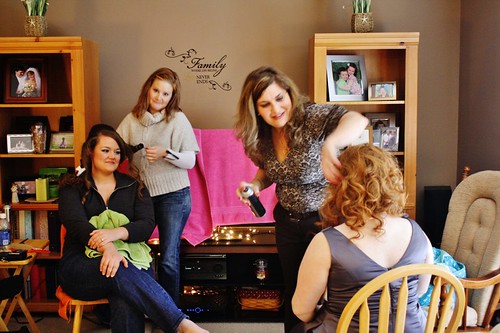
There was a lot of make up, hair spray and bobby pins flying around.


Here are my two best friends from college, Ame and Lauren. We were also roommates and shared so many fun moments together those 4 years in New York. I am forever grateful for their friendship.


This is my longest friend, Sarah. We've known each other since elementary school!


 This is Michael's sister, Rachel. She is amazing and I am so lucky to have her as my sister-in-law.


And here is my fun-loving cousin, Devon. She brings so much joy to my life!


This is my amazing sister, Ashley. She is my one and only sibling. Our relationship over the years has grown stronger than ever. I am so blessed to have her in my life. There is no one like a sister!


And here is my beautiful mother. She was an amazing help to me that day, and every day leading up to the wedding. Her kind, unselfish, loving heart has been such a blessing to me over the years. Her marriage to my father (27 years and better than ever!) has been an inspiration to Michael and I.


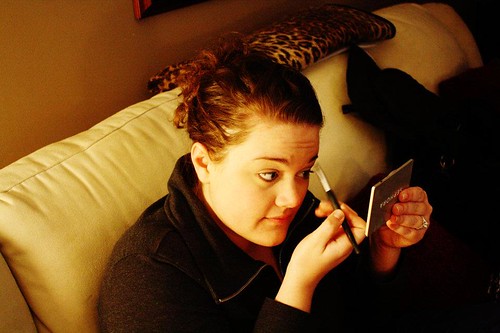
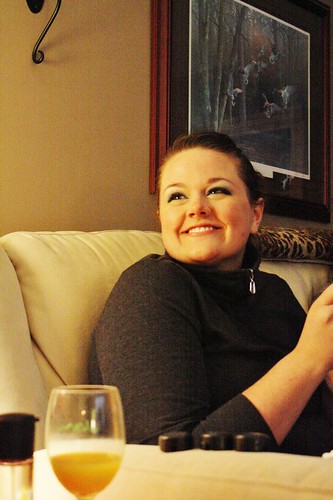
I found a comfortable spot on Janice's sofa right in the middle of all the action and did my own make up. It is fun for me, and I was glad to have that quiet time to just sit and enjoy everything going on around me.

Can you tell I was so happy the day I got to marry my love was finally here?


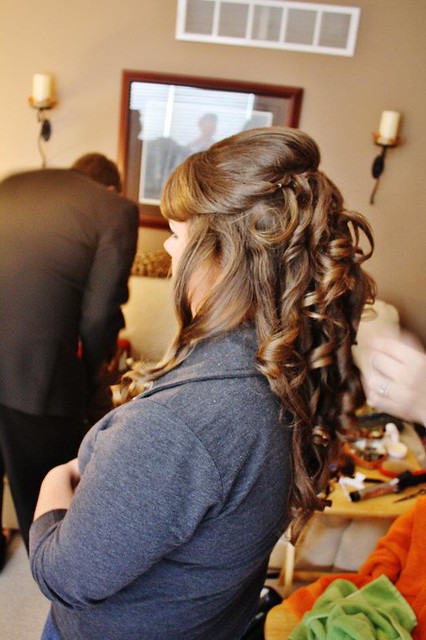
After make up was done, I had my hair styled by a wonderful lady that put up with all my long hair and almost an hour of curling. We did two hair trial runs together before my wedding, and found the perfect style. She was so talented and calming, and I will always be grateful I had her to do my hair for my special day!


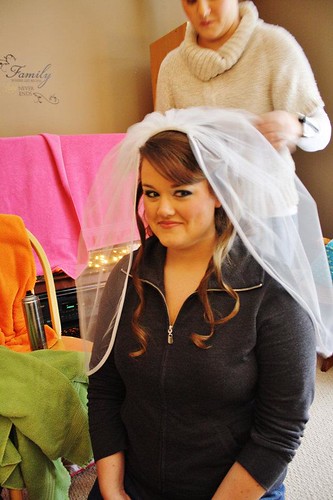
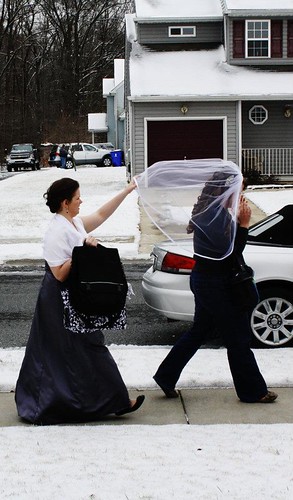
All my bridesmaids looked on as she put the finishing touches on my hair, and put my veil on.


It was an amazing moment for me. I felt like such a bride!


My sister helped me get in the car, and off we were to the wedding venue.

I remember the reality of everything hitting me then. I couldn't believe the day I dreamed about since I was a little girl was here, and I was only an hour away from walking down the aisle. I couldn't wait to see Michael at the other end.

I am so grateful to Janice for opening up her home to us, so we could have a relaxed and comfortable space to get ready. Thank you to Courtney, the most amazing hair stylist! And to all my bridesmaids who kept me calm that morning - you are amazing and I love each of you more than words.

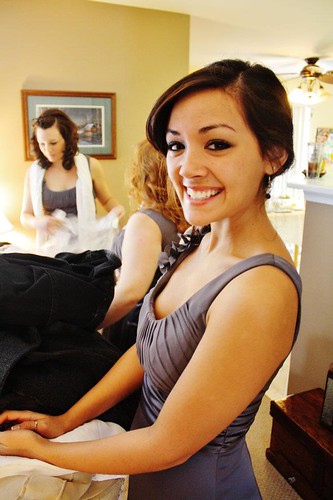
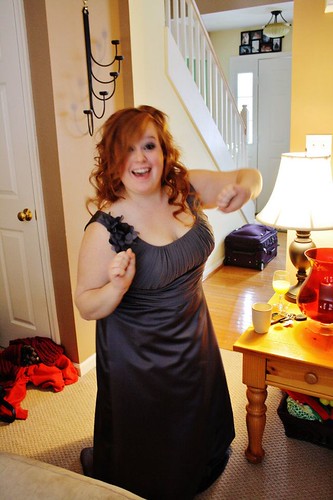
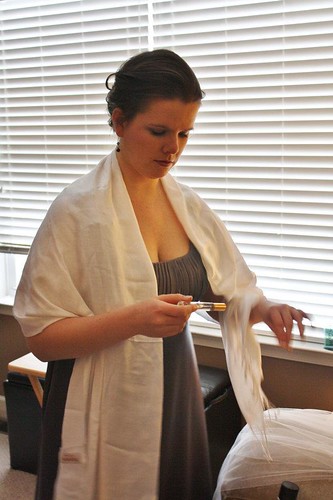
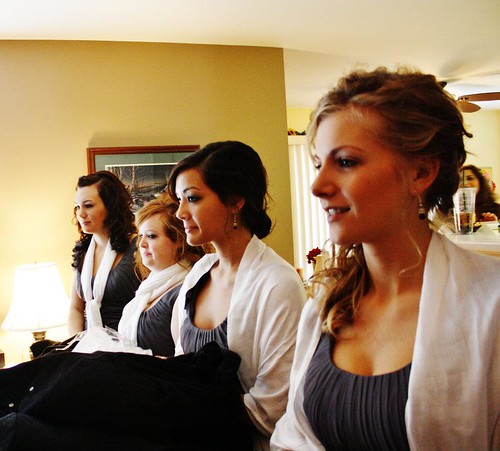
And in case you are wondering, the beautiful gray bridesmaids dresses are from David's Bridal (in Pewter).

More wedding stuff to come over the next few months!

April 5, 2012

cuban panini

I never knew I liked pickles until I had a life changing experience at a local restaurant here in Delaware that makes their own. Michael and I had lunch there one day and there was this fresh, crisp pickle on my plate. I took a bite and the crunch was out of control. The flavors were so bright with that vinegar bite.

I can't say that I'm now a pickle fanatic... but I did buy the first jar of pickles I've ever bought last week, to make this sandwich.


I know this isn't a super traditional Cuban sandwich made with real Cuban bread. But you can get that same crusty, hard exterior by grilling the bread and making a panini.


Roasted pork tenderloin is the star of this sandwich. I just used a Smithfield pre-marinated 1 1/2 pound pork tenderloin to make my life easy. You could also season your own pork tenderloin and roast it that way.

Slicing the pork in thin slices keeps it from being too tough and chewy. You want it to be moist and tender for this sandwich.


The roasted pork is layered with sliced deli ham, cheese, pickles and a mustard/mayo mixture. I pressed it on my panini grill to get that melty, crunchy goodness. Hello, lovely.

The roasted pork is so flavorful, and mixed with smoked ham and the crunchy pickle... it's such a great combination of textures and flavors.


Cuban sandwiches are a favorite of mine, so this panini is a big winner in my book. It saved me from a week-long chicken extravaganza. Embrace your inner pork and make this sandwich.

Enjoy!


Cuban Panini

Makes 4 sandwiches

1 1/2 pound pre-marinated Peppercorn Garlic pork tenderloin (I used Smithfield)
1/2 pound sliced smoked ham
4 slices Swiss cheese
4 "stackers" style pickles (I used Vlasic)
4 tablespoons honey mustard
2 tablespoons mayonnaise
8 slices sourdough bread
Cooking Spray

Preheat oven to 350 degrees. Spray an uncovered, shallow pan (I used a 13x9) with cooking spray. Place tenderloin in pan and bake for 20 minutes per pound or until meat thermometer reads 145-150 degrees internal temperature. Let rest for 10 minutes before making small, 1/4 inch slices.

Meanwhile, in a small bowl mix together mustard and mayonnaise to make the sauce. Set aside. 

To assemble the sandwiches, layer even amounts of pork, ham, cheese and pickles on 4 slices of the bread. You may not use all the pork, so just put the extra slices in a container and refrigerate for another time. On the other 4 slices, spread your mustard/mayo sauce. Place the sandwiches on a panini press coated with cooking spray, or grill them in a frying pan on the stovetop. Be sure to press down a bit so everything melts together. Serve immediately.

April 2, 2012

orzo with chicken, asparagus and goat cheese

I love coming up with a pasta dish that doesn't involve opening a jar of pre-made sauce. There is something so satisfying about slicing fresh tomatoes, chopping up garlic and fresh basil.


Cherry tomatoes are delicious and convenient. Just cut them in half and saute for a few minutes in olive oil. They start to soften and break apart, creating a light sauce.


Chicken broth, garlic, fresh basil, asparagus, chicken and goat cheese are added. These flavors are so lovely. The asparagus stays crisp and the goat cheese is ridiculously creamy. I love goat cheese! It has such a strong flavor, you don't need to add a lot to get that delicious flavor and texture. To save even more calories, skip adding the cheese into the sauce and just crumble it on top to serve.


This is so fresh and perfect. We had my sister and her husband over for dinner, and he said it was his favorite meal he's had at our house so far.


Enjoy!


Orzo with Chicken, Asparagus and Goat Cheese

Serves 4 people

1 pint cherry tomatoes, washed and cut in half
3 cloves garlic, minced
2 tablespoons extra virgin olive oil
1/2 cup low sodium chicken broth
8 stalks of asparagus, washed and cut into 1 inch pieces
1 pound skinless, boneless chicken breasts, cut into 1-inch chunks
2 cups cooked orzo pasta (follow directions on box)
2 ounces goat cheese, crumbled
1/4 cup chopped fresh basil
Salt and pepper to taste
Optional to serve: more chopped fresh basil and crumbled goat cheese

Preheat oven to 350 degrees. Place chicken in an even layer on a cookie sheet or 13 x 9 pan coated with cooking spray. Sprinkle 1 clove garlic, minced (1/3 of the total garlic) over the chicken and season with salt and pepper. Cook for 15-20 minutes, depending on how thick the chicken pieces are, or until cooked all the way through.

Meanwhile, heat olive oil in a large skillet over medium heat. Add sliced cherry tomatoes and saute for 5-7 minutes, or until the tomatoes start to soften and break apart. Use a wooden spoon to smash the tomatoes a bit. Lower the heat to medium low, and add garlic. Saute for a few minutes being careful not to burn the garlic. Add chicken broth, asparagus, fresh basil, cooked chicken and goat cheese. Stir until combined and let the asparagus cook for 1 minute, then turn off the heat. You want the asparagus to maintain the crisp texture, but not be raw. Add cooked orzo and stir to combine. Season with salt and pepper if needed.

Serve warm with some fresh basil and crumbled goat cheese on top, if desired.